Showing posts with label Healthy. Show all posts

Sunday, July 10, 2011

Roasted Spiced Nuts


I have not posted in a long time....it's actually been almost a year.  I'm a teacher and during the school year, meals tend to be quick and not blog-worthy.  It's usually something I throw together with no measuring or recipe involved.  I cook something and we eat.  During the summer, I get a little more creative and try new recipes. 

There is something I have been thinking about blogging for quite a few months.  It's a recipe I put together after trying some that I found online - roasted spiced nuts.  This recipe came from my need to use up a supply of almonds and cashews that I had.  I was tired of eating them raw and wanted something sweet and spicy. 

It is a super-simple recipe and can be adapted many different ways with a variety of spices, extracts and nuts.  They are versatile, also.  We eat them as-is, on ice cream, and my favorite, on salads.  My next experiment will be to put them in a chocolate chip cookie recipe. 

Roasted Spiced Nuts

8 cups of nuts (raw, if available)
2 egg whites
1 cup Splenda
1/3 cup brown sugar
1/2 tsp cinnamon
1/2 tsp ground ginger
1/8 tsp nutmeg
1/8 tsp ground cardomom
1 tsp salt
1 tsp vanilla extract

Preheat oven to 275 degrees.  Cover a large cookie sheet with sides with non-stick foil. 

In a large bowl, beat the egg whites and vanilla until foamy. 

In a small bowl, mix the Splenda, brown sugar, salt and spices. 

Add the nuts to the large bowl with the egg whites and mix thoroughly until all the nuts are coated.  Add the sugar, salt and spice mixture and stir gently to coat all the nuts.  Spread the nuts into the pan.  Bake for one hour, stirring every 20 minutes.  Let cool completely and store in air-tight container for up to two weeks.

Tuesday, August 3, 2010

Almost Guilt-free Alfredo Sauce


One of my favorite pasta dishes is chicken or shrimp alfredo.  It is rich and creamy and full of fat and calories.  I've been working on my own recipe for a healthy version of this dish but haven't quite mastered it yet. 

When I came across this recipe on The Gracious Gourmet I didn't believe it could work.  There was no way it could be this easy and delicious.  The secret to Tiffany's recipe is cottage cheese.  Yes, cottage cheese.  To tell the truth I had never tried cottage cheese until this past week.  The texture of it has always turned me off.  I have a feeling there are a lot of people that feel the same way.  I was brave and tried it.  Believe it or not, it is really good.  It tastes like little bits of cheese in tangy cream.  I'm going to have to do some more research to find out how it is good for you.  It doesn't really taste like it should be. 

This sauce couldn't be any easier.  It turns out to be thick and rich and it's a very good option if you are watching your wasteline.

This made a lot of sauce so you may want to half the recipe.  Now, I just need to come up with another use for the leftovers.

Almost Guilt-Free Alfredo Sauce
adapted from The Gracious Pantry

Ingredients:

2 16 oz containers of lowfat cottage cheese
1 cup grated parmesan cheese
1 tsp garlic
1 tsp dried basil
1 tsp dried rosemary
1/4 lowfat milk

Directions: 

Combine all ingredients in a saucepan.  Heat until the mixture warms and bubbles for about 5 minutes.  Transfer the warm mixture to a blender or food processor.  Process until the mixture becomes smooth.  Add a little more milk if it is too thick.  Pour back into the pan and heat until hot and bubbly.  Add salt and pepper to taste.  Pour over cooked pasta.  Add some grilled chicken and steamed broccoli if desired. 


This post has been linked to:
24TbadgeGIRLICHEF 

                                           Tuesday Night Supper Club


and What's on the Menu Wednesday at Dining with Debbie

Sunday, July 25, 2010

16 Spice Shredded Beef Enchiladas with Zucchini and Onions


Tacos are one of my fast and easy "go to" meals.  I have always used ground beef until I recently tried cooking a beef chuck roast in the crockpot for my taco meat.  Check out the Tacos de Barbacoa recipe here.  I wanted to use the same concept but with a different spice rub.  I chose Bobby Flay's 16 Spice Rub.  I made this spice blend a while back and still had a lot left.  It was perfect for this meal.  I know 16 spices looks a little intimidating, but many of them I already had.  You could use any spice mixture that you want and still make these enchiladas.  But, I challenge you to make the 16 spice rub sometime.  It is really delicious.  It has some heat but also some warm and earthy flavors from the allspice, cinnamon and cloves.

I made this recipe up as I went along.  I don't post many of the meals that I make simply because they are usually just thrown together.  I had a good feeling about this one so I actually wrote things down as I cooked. 

My husband was skeptical when he walked in the kitchen and the enchiladas did not look like the usual covered-in-cheese-and-meat ones we have cooked for the past 15 years. These were plain on top.  I decided to bake the enchiladas without sauce on top because I knew the salsa I planned on using would make them soggy as they baked.  They were not filled with the old standard meat and cheese of the old days.  These were filled with shredded beef, onions, peppers, a little sour cream and cheese, and guess what...zucchini.  Yes, zucchini.  I've learned that zucchini can be a great filler and make a meal go a lot farther.  AND add some nutrition.  They don't have a lot of flavor so they are perfect for this. These enchiladas are stuffed full, but not with a lot of fat and bad-for-you stuff.

These enchiladas were a hit!  My husband even apologized later for judging and jumping to conclusions before he had eaten them.  WOW!  (That doesn't happen too often and it made me feel good).  He ate them for lunch the next day and said they were great reheated, too. 

The roast that you cook is enough for two meals.  I made tacos one night and these enchiladas the next night. 

Bobby Flay's 16 Spice Rub and Roast

3 tablespoons ancho chile powder (heat level: 4)
3 tablespoons pasilla chile powder (heat level:4)
3 tablespoons ground cumin
3 tablespoons ground coriander
3 tablespoons ground ginger
2 tablespoons garlic powder
2 tablespoons onion powder
1 tablespoon allspice
1 tablespoon cinnamon
1 tablespoon ground cloves
1 tablespoon ground fennel seed
1 teaspoon chile de arbol – can substitute cayenne (heat level:7)
3 tablespoon brown sugar
2 tablespoons kosher salt
2 tablespoons coarsely ground black pepper
1 teaspoon cayenne pepper (heat level:8)

4 lb beef chuck roast
1 large onion, sliced
1/2 cup water or beef broth

In a small bowl stir all spices together.   Rub on all sides of the roast; rub in with your fingers. If you can, put it in the refrigerator for a while (I let it sit for about 2 hours).

Place in a 5 to 6 quart slow cooker with broth. Add sliced onions on top of the roast.  Cook, covered on low-heat setting 10-12 hours or until tender. (I cooked mine for about 8 hours and it was perfect).


Enchiladas
 
1 cup chopped onions
1 cup zucchini, chopped fine
1/2 cup poblano pepper, chopped
1 jalepeno, chopped
3 cloves of garlic, chopped
salt and pepper to taste
1-2 tbsp olive oil
1/2 cup lowfat sour cream
1 cup cheese, grated (cheddar or monterey jack)
12 corn tortillas
4 cups of salsa
 
Directions:
 
Preheat oven to 350F.  Heat a large nonstick pan to medium high heat.  Add olive oil.  Add onions, zucchini, and peppers. Cook for about 7 minutes or until the onions start to turn translucent.  Stir in the garlic and cook for about 2 minutes.  Add salt and pepper to taste. Remove from heat.  Stir in cheese and sour cream.  Set aside. 
 
Cover two cookie sheets with foil or spray with nonstick spray.  Lay out tortillas on the pans in a single layer.  Spray lightly with cooking spray.  Place pans in the oven and cook for about 4 minutes. 
 
Spray a 13x9 baking dish with nonstick spray.  Spread about 2 tbsp of zucchini mixture on one of the warm tortillas and add some of the shredded taco meat.  Roll up the tortilla and place in the pan seam side down.  Repeat with the rest of the tortillas.  Cover pan with foil and bake for 30 minutes. 
 
Serve the enchiladas with warm salsa on top. 


I have linked up this post to Just Something I Whipped Up at The Girl Creative.

The Girl Creative

Friday, July 16, 2010

Peanut Butter Banana "Tacos"


I saw this idea in the Clean Eating magazine I think.  This makes a perfect snack, breakfast and I even thought about putting it in my son's lunchbox.  He loved them!

I spent the past week taking care of my 4 nephews while my brother and sister-in-law went on a fabulous cruise in Mexico.  I could not wait to make these for the kids.  They were a huge hit!  (We came up with the banana taco name together.)  What makes it even better is that they are healthy. 

They are very simple to prepare and cook. 

Ingredients:

bananas
honey or agave nectar
natural peanut butter
whole grain flour tortillas
butter

Directions:

Spread about a tablespoon of peanut butter on the tortilla and lay the banana in the center.  Drizzle a little bit of honey or agave over the banana.  Roll it up.  Spread a little softened butter (it doesn't take much) around the outside of the rolled up "taco".  Heat a large nonstick pan to medium high heat.  Place the taco(s) in the heated pan.  Cook and roll them in order to brown on all sides.  Enjoy warm or at room temperature. 


I have linked this post to Foodie Friday at Designs by Gollum  and Wholesome Whole Foods at Health Food LoverGo check out all the great recipes and ideas!

Tuesday, June 29, 2010

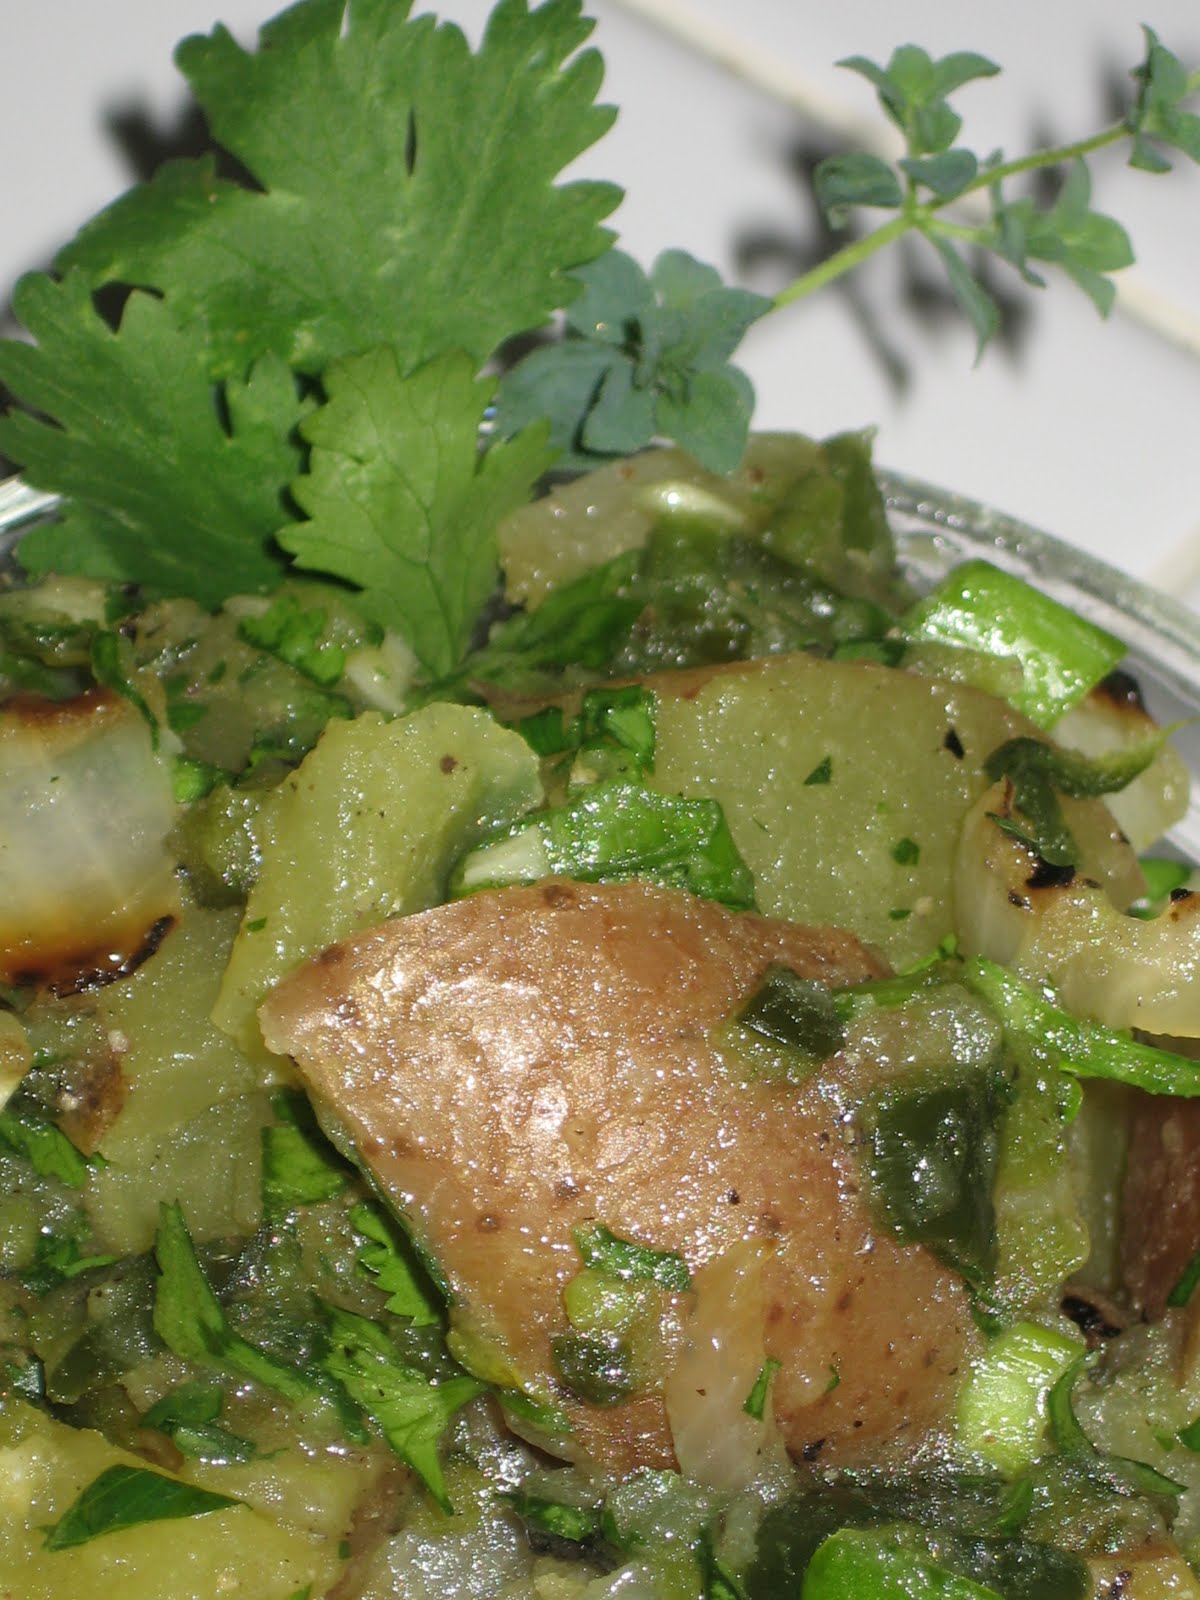
Spicy Cilantro and Lime Potato Salad


I wanted to make a potato salad but not a traditional one.  I am not a fan of the mustard-based potato salad so, I came up with this recipe.  My son and I really liked it- my husband, not so much.  He likes the yellow potato salad and wasn't very excited about eating this green potato salad I set before him. 

I am posting this at Side Dish Showdown at Cinnamon Spice and Everything Nice.  Side dishes have always been a challenge for me.  I have very little creativity when it comes to side dishes and usually all of my attention goes to the protein part of my meals.  This monthly challenge has forced me to think about this important part of the meals we eat.  At least I am creating one good side dish a month.

Side Dish Showdown Blogger Event

I found the dressing recipe at For the Love of Cooking and just added to my ingredients. 

Ingredients:

3 lbs of red potatoes, diced in large chunks and steamed
1 onion, yellow or purple
2 large poblano peppers
2 jalepeno peppers
1/4 cup of sliced green onions


Dressing:
1/2 cup of chopped cilantro
1/4 cup olive or canola oil
1-2 tbsp fresh lime juice
1 tbsp apple cider vinegar OR red wine vinegar
salt and pepper to taste
1 clove garlic minced
1/2 tsp oregano

For the dressing, whisk all ingredients together in a small bowl.  Set aside while you prepare the rest of the salad. 

Roast the onion and peppers under a broiler or on the grill until they are nicely charred.  The peppers should be blistered.  Put the peppers in a bowl and cover with plastic wrap for about 15 minutes to steam them.  Take them out and peel the skin off.  Roughly chop the peppers and onions and add them to the potatoes.  Add the green onions.  Pour the dressing on the potato, onion and pepper mixture and combine well.

The salad can be eaten cold or at room temperature.


This post is also being linked to:

Finer Things Friday

What's on the Menu Wednesday @ Dining With Debbie

Fight Back Friday at Food Renegade


Saturday, June 19, 2010

PBandJ - Updated Healthier Version


We love peanut butter and jelly sandwiches at our house.  I have done my best trying to make them a little healthier by using fresh all natural peanut butter, reduced sugar jelly and whole wheat bread.  The biggest problem in this sandwich was the jelly.  Even with "reduced sugar" it still wasn't great. 
I found this idea in my new favorite book, The Eat-Clean Diet for Family and Kids by Tosca Reno.  This is a terrific book if you are looking to improve the diet of your family. 


Instead of plain peanut butter, I decided to make some of the healthy peanut butter dip (minus the chocolate chips) I made a couple weeks ago and use that on the sandwich.  It was perfect!  AND instead of the "reduced sugar" jelly I just used some sliced strawberries....no sugar at ALL!  I thought it turned out very yummy and so did my son.  It made a quick lunch after his baseball game today.


I am sharing this post at Souper Sundays at Kahakai Kitchen, Make it From Scratch and Tasty Tuesday at City Wife, Country Life so come check out all of the wonderful soup, salad and sandwich recipes that others are sharing.   

Tasty TuesdaySouperSundays

Thursday, June 17, 2010

Ranch Chicken Salad Sandwich


I didn't think my son would ever eat chicken salad, but I found a way to make it that he loves.  As I have said before, he will eat ranch dressing on just about anything.  I decided to make some chicken salad using the homemade healthy and clean ranch dressing recipe I tried a couple weeks ago.  Total success!

This makes a lot of chicken salad so you may want to half it.  You will also have some ranch dressing left over to use elsewhere. 

Ingredients

4 small chicken breasts, cooked and chopped
3 ribs of celery, chopped
2 cups of grapes, cut in half
1/2 cup of pecans, chopped
2 cups of ranch dressing (recipe below)

Mix all ingredients until well combined. 


Healthy and Clean Ranch Dressing

1 1/2 cups of low fat buttermilk
3/4 cup of plain nonfat greek style yogurt
1 1/4 tsp onion powder
1 tsp dried dill
2 1/2 tsp dried parsley
2 1/2 tsp dried chives
2 1/2 tsp salt

I have linked this recipe to Foodie Friday at Designs by Gollum and Food on Fridays. Come check out all of the fabulous recipes that have been posted.


Tuesday, June 8, 2010

Teriyaki Chicken Stir-Fry


I love chicken teriyaki and found this recipe by Ellie Krieger from Food Network.  I added onions and bell peppers and stir-fried.  It was wonderful!

Ingredients


1/4 cup low-sodium soy sauce
2 tablespoons brown sugar
2 tablespoons dry sherry
2 tablespoons rice vinegar
2 garlic cloves, crushed with a garlic press or minced
1 teaspoon finely grated fresh ginger
1/4 teaspoon red pepper flakes
2 pounds skinless chicken thighs, cut into bite-sized pieces
1 red bell pepper, sliced
1 onion, sliced
2 teaspoons sesame seeds

Directions

Combine the soy sauce, sugar, sherry, vinegar, garlic, ginger and red pepper flakes and stir until the sugar dissolves. Transfer to a resealable plastic bag and add the chicken. Seal the bag and marinate the chicken in the refrigerator, turning once, for 1 hour. The chicken can be marinated for up to 4 hours.

Add some oil to a large nonstick pan on medium high heat.  Add the onion, peppers and chicken and cook until the chicken is cooked through.  Serve over rice and top with sesame seeds and green onions (if desired).  Enjoy!

Saturday, June 5, 2010

Healthy and Clean Ranch Dressing


My son loves ranch dressing and will dip just about anything in it.  I found this recipe on The Gracious Pantry while I was seaching for information on Clean Eating and healthy recipes.  I am baby-stepping my way into Clean Eating.  My family is not really excited about it, but I am going to push forward anyway.  I have tried another recipe that I found for healthy homemade ranch dressing and we didn't like it at all.  This one turned out really good. 

I made some to dip broccoli in on our way to Texas tomorrow.  I have spent most of the day preparing food for our 550 mile trip and some for the week while we stay at my brother's.  I am determined to not stop at McDonald's tomorrow like we usually do.  I made chicken salad using this dip as the combining agent today and will make pita sandwiches with it (recipe coming soon). 

I will let you know how the trip goes and how our healthy eating on the road goes.  I am a little nervous, but I plan on doing my best to eat the right food most of the time. 

Check out The Gracious Pantry for more great recipes.


Healthy and Clean Ranch Dressing

(Makes about 8 tablespoons)

5 tablespoons low fat buttermilk
3 tablespoons nonfat plain Greek yogurt
1/4 teaspoon onion powder
1/2 teaspoon dried dill
1/2 teaspoon dried parsley
1/2 teaspoon dried chives
1/2 teaspoon salt
Pepper to taste

Directions

Whisk all ingredients in a bowl until well blended.

Nutritional Content

1 serving = 2 tablespoonds

Calories: 10
Total Fat: 2 gm
Saturated Fats: 0 gm
Trans Fats: 0 gm
Cholesterol: 0 gm
Sodium: 55 mg
Carbohydrates: 1 gm
Dietary fiber: 0 gm
Sugars: 1 gm
Protein: 1 gm


This post has been linked up to:

Food Revolution Friday @ Notes from the Cookie Jar

Fight Back Friday @ Food Renegade

Friday, June 4, 2010

Spinach and Feta Fritatta


This was a yummy recipe that I found at Gina's Weight Watcher Recipes

Ingredients:

2 whole eggs
8 egg whites
1 tsp olive oil
1/2 red onion, finely chopped
3 scallions, chopped
1 package frozen chopped spinach, thawed
2 oz crumbled feta
2 tbsp Parmigiano-Reggiano
salt and freshly ground pepper


Directions:

Squeeze all water from spinach. In a 9 inch non-stick sauté pan, heat olive oil over medium heat. Add the onion and scallions and cook until soft, about 4 minutes.

Meanwhile in a medium bowl, beat the eggs. Add salt, pepper, cheeses and spinach and mix well. Pour the mixture into the skillet and cook until the bottom sets, about 5 minutes. Hold a large plate over the pan and invert the frittata onto the plate, then slide it back into the pan. Cook about 5 minutes longer. Serve hot.

Wednesday, June 2, 2010

Rosemary Chicken with Sweet and Sour Dipping Sauce


This chicken was incredible! I took advantage of my new herb garden for the fresh rosemary.  I quickly realized that I'm going to need another rosemary plant.  It took quite a few little branches to make the required amount of minced rosemary for this recipe. 

The dipping sauce was so easy to make and  went perfectly with the chicken.  We will be having this chicken again very soon.


Rosemary Chicken with Sweet and Sour Dipping Sauce
from The Best of Fine Cooking
         Fresh and Quick

1Tbsp plus 1tsp minced fresh rosemary
2 tsp dark brown sugar
1 tsp crushed red pepper flakes
Kosher salt and freshly ground black pepper
2 1/2 lb. boneless, skinless chicken thighs, trimmed of excess fat
2 tbsp vegetable oil; more for the grill
1 cup orange marmalade
1/4 cup rice vinegar

Directions

In a small bowl, mix 1 tbsp fo the rosemary with the brown sugar, red pepper flakes, 2 tsp salt, and 1tsp black pepper.  Put the chicken thighs in a shallow pan, drizzle with the oil, and toss to coat.  Sprinkle the chicken evenly with the rosemary mixture.

In a small saucepan, warm the marmalade, the vinegar and the remaining 1 tsp rosemary over low heat until just warm.  Set aside in a warm spot.

Prepare a hot charcoal fire or gas grill with all burners on medium high for 10 minutes.  Clean the hot grate with a wire brush and then lubricate it with an oil-soaked paper towel.  Put the chicken on the grate and grill (uncovered over a charcoal fire, or covered on a gas grill) until one side has dark grill marks, 5 to 6 minutes for large thighs or 4 to 5 minutes for medium and small thighs.  Turn and continue to grill until well marked on the other sides and cooked through, another 5 to 6 minute for large thighs or 4 to 5 minutes for medium and small thighs. 

Transfer the thighs to a platter and let rest for 4 to 5 minutes.  Serve hot, warm, or at room temperature, with individual bowls of warm marmalade dipping sauce. 

Tuesday, June 1, 2010

Healthy Peanut Butter Dip


This makes a perfectly healthy mid-afternoon snack for the kiddos and for us, also.  I got the recipe from Meal Makeover Moms' Kitchen.    I added a tsp of vanilla agave nectar to sweeten it a little. 

We ate the dip with apples as you can see but I was thinking that it could go on our waffles in the morning, also.  Cameron wants to eat it with bananas.  YUM!


Healthy Peanut Butter Dip

1/2 cup lowfat vanilla yogurt (I used some of my homemade yogurt)
½ cup creamy peanut butter
¼ cup mini chocolate chips
1 teaspoon ground cinnamon
1 teaspoon vanilla agave nectar

1. Combine all ingredients in a bowl and serve with apples, celery, pretzels or anything else you can think of that will go well with peanut butter.

Monday, May 31, 2010

Broccoli with Balsamic Caramelized Onions


I am involved in the Sidedish Showdown at Cinnamon Spice and Everything Nice.  We have been cooking and writing about side dishes that we are creating at home.  You ought to go and check out the other submissions.  There is some great food listed!

We eat a lot of broccoli in my house.  It is one of the only green foods that my husband and son will eat (and he won't eat that much).  I know we all get tired of the boring steamed broccoli so I wanted to change things up a little.  This is what I came up with.


2 cups red onions, sliced thinly
2 tbsp of olive oil
1 tbsp balsamic vinegar
salt and pepper to taste
4 cups steamed broccoli
1 tbsp of butter
asiago cheese
Chopped parsley and basil (optional)

Add oil to a large nonstick pan over medium high heat.  Saute onions until caramelized (about 20 minutes).  Add vinegar and cook for 5 minutes.  Salt and pepper to taste.  Add steamed broccoli and butter and cook together for 3 minutes.  Remove from heat and top with cheese, parsley and basil.

Sunday, May 30, 2010

Homemade Yogurt Made in a Crockpot

This is my favorite new recipe.  I have made around 10 batches of homemade yogurt in the past couple months. I found the recipe at A Year of Slowcooking.  Who knew it was so easy?  I didn't really eat a lot of yogurt to begin with but I saw this and knew that I had to try it.  Now I eat it almost every day in one way or another. I make smoothies.  I eat it with a variety of fruit with a squirt of amaretto agave nectar. I add it to my blueberry muffin batter.  I have put it in soup.  My newest passion is homemade frozen yogurt.  YUM!   

I used whole milk in my first batch, because I read that you should start here when you are new at making yogurt.  I then went to 2% and now I only use 1%.  It worked equally well with all of them.  You aren't supposed to use ultra-pasteurized milk, but I accidently bought some organic milk that I didn't realize was ultra-pasteurized.  By the time I realized what I had done I decided to go ahead and give it a try.  I had no hope of it turning out.  But, it did!  I was shocked! 

So, this is how I make the yogurt. The only three ingredients you need are a carton of plain yogurt that has active live cultures, some fat free powdered milk and half a gallon of milk (not ultra-pasteurized).  This is the yogurt I have used as a starter.


The two tools you need to make your yogurt is a thermometer and a crockpot.  This is my crockpot that I use.


I pour the milk into the crockpot.  Turn it onto low and heat for 2 hours.  I then turn the crockpot off and let it cool to about 120-130 degrees.  This is very important!  If it is too hot the live bacteria will die.  If it is too cold the bacteria will not grow.  I check the temperature with a candy thermometer.  Once it is cooled to the correct temperature, I take the yogurt starter that has been brought to room temperature and mix it with 1/2 cup of powdered milk.  The milk is supposed to thicken the yogurt.  I then add two ladles full of the warmed milk from the crockpot to the yogurt mixture.  Mix well.  Then, I gently mix in the yogurt/milk mixture into the rest of the warm milk in the crockpot.  I put the lid on the crockpot and then cover the crockpot with about five blankets.  I leave it like that for about 24 hours.  AND THEN!  I have homemade yogurt!

I usually put my milk in the pot around 6:00.  Let it heat until 8:00.  It cools in about 2 hours to the correct temperature.  I add the yogurt and powdered milk and then I cover it before I go to bed.  When I get home from work the next evening the yogurt is ready. 

There are many methods online for making yogurt.  Some involve putting the yogurt mixture in a cooler with warm blankets.  Some involve setting the pot on a heating pad.  I didn't put this much effort into mine and it turns out perfect every time!  The only time mine did not turn out was when I forgot about my milk heating in the first stage.  It cooked for about 4 minutes.  Way too long!  I had to dump it out and start over again. 

So some people ask:  Why would you make your own yogurt when you can just go buy it at the store?  There are several reasons.  First of all, I know what is in my yogurt.  There are no preservatives, chemicals or sugar.  Next, it is super cheap.  One carton costs around $1 each at the store.  I make about 8 cups of fresh yogurt with very little effort and about $2.  Why wouldn't you make your own? 

Note:  This yogurt is not super thick.  If I want thicker yogurt I strain it in a coffee filter over a bowl. 


I have let it strain for 2 days and it turns into the consistency of softened cream cheese.  This worked very well in my fruit tart I made. 

Give it a try and let me know how it goes!


I am posting this at Make It From Scratch.  Come check out the other posts!

Monday, May 3, 2010

Black Bean and Corn Salsa


This is a great, healthy side dish eaten cold or at room temperature.  I got the recipe from Cookin' Lean Like Paula Deen.  It makes a huge bowl so I froze some of it and it worked really well. 

INGREDIENTS:

2 15-ounce cans black beans, rinsed and drained
1 17-ounce package frozen whole kernel corn, thawed
2 large tomatoes, seeded and diced
1 small onion, diced
1/8 to 1/4 cup chopped fresh cilantro
2 tablespoon lime juice
1 tablespoon red wine vinegar
salt and pepper to taste


DIRECTIONS:

Mix all ingredients thoroughly in a large bowl. Cover and chill overnight. Taste and add salt, pepper, or more lime juice as necessary. Serve cold or at room temperature.

Saturday, May 1, 2010

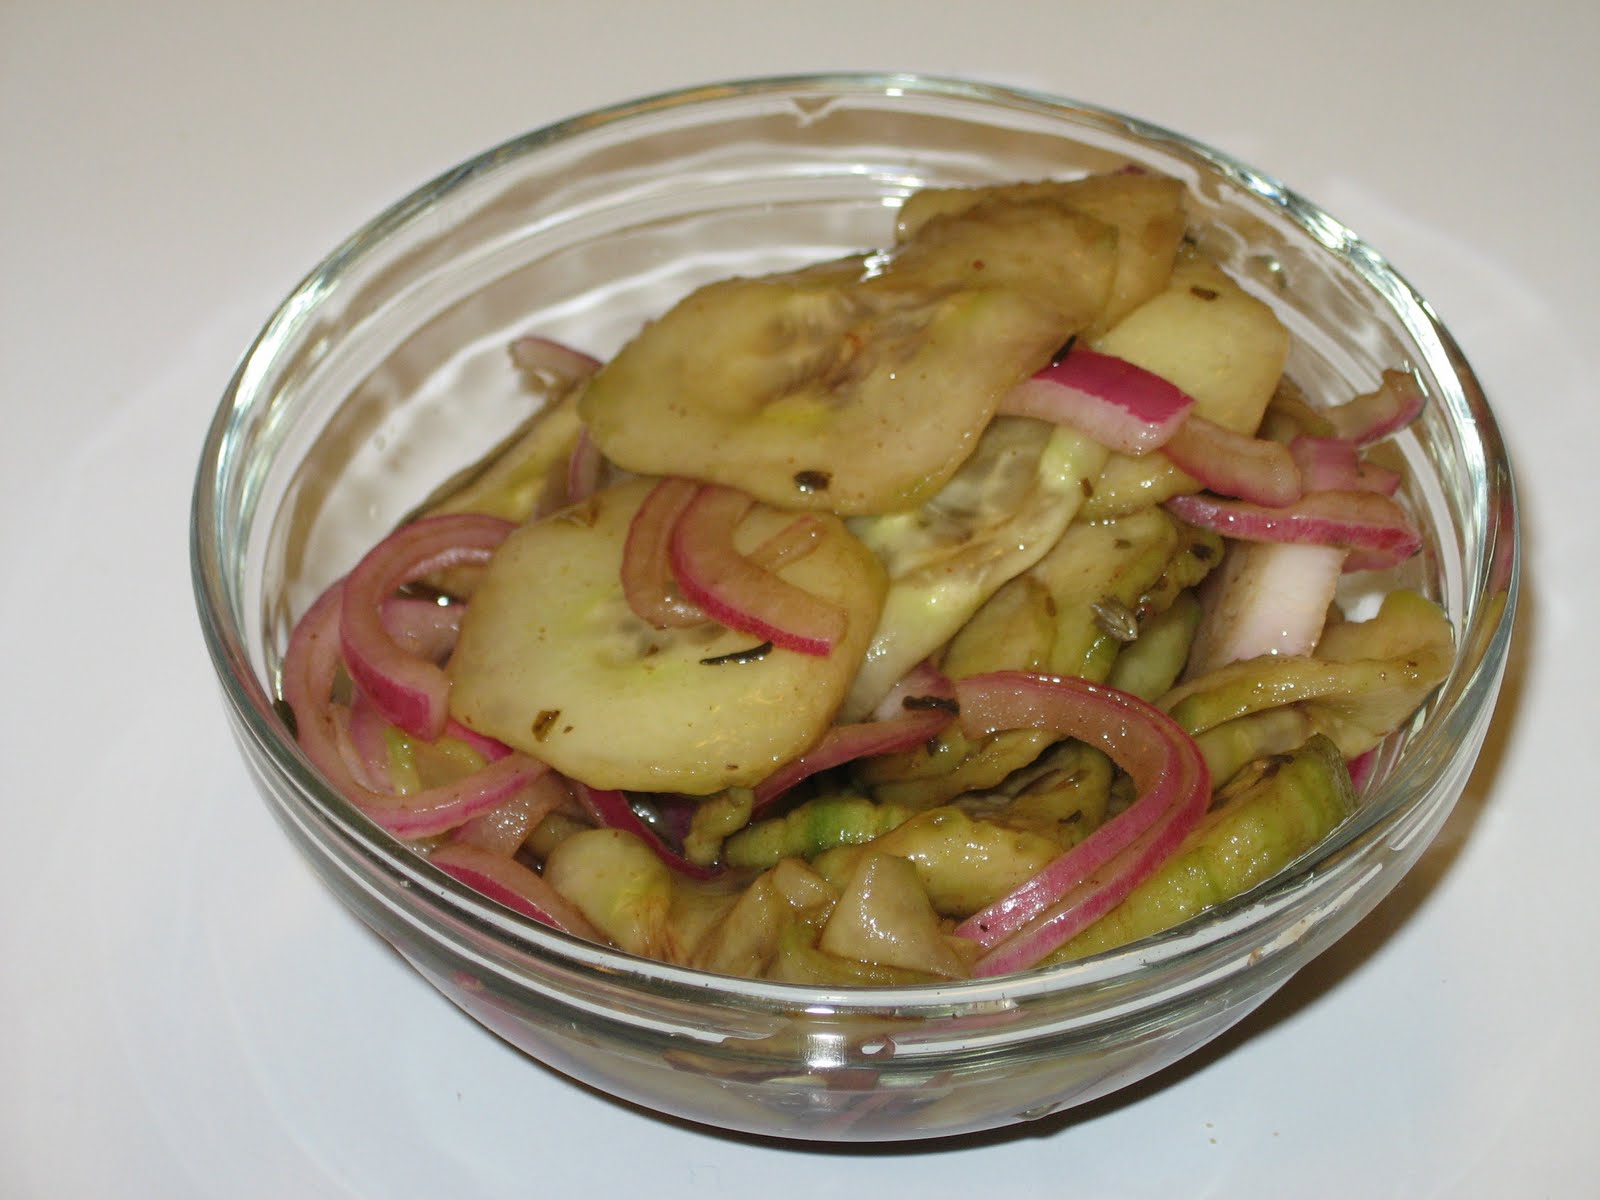
Cucumber and Onion Salad


I was inspired by Mrs. Jenn B of Misadventures of Mrs. B to make this refreshing cucumber salad.  I have never made anything like this so I was kind of excited.  I changed up her recipe a little because I used balsalmic vinegar and red onions instead of white. I loved this salad.  It was very refreshing and healthy!

2 cucumbers, peeled and sliced thin
1 onion sliced thin
1 tbsp salt
1/2 cup basalmic vinegar
1/4 cup water
1/2 cup sugar (I used Splenda)
2 tsps of Italian Seasoning
pepper to taste

Put the sliced cucumbers in a bowl and sprinkle the salt over them and toss gently.  Cover and refrigerate for an hour or so. 

Mix the remaining ingredients (except the onions) and bring to a boil in a small pan.  

Take out the cucumbers and drain excess water.  Add the sliced onions.  Pour vinegar mixture over the onions and cucumbers.  Cover and refrigerate for at least an hour before serving.