Wednesday, March 31, 2010

HB in 5 Bread Braid #8


Carrot and Pecan Bread

I had read some reviews about this bread from the HB in Five group saying that it was good but don't expect a sweet bread.  Well, I wanted a sweet bread.  I changed a few things- I added some real vanilla extract, some Vietnamese cinnamon and doubled the amount of brown sugar that was listed.  I also used pecans instead of walnuts because I like pecans better.  Golden raisins were my fruit of choice.

I decided to make them into rolls.  The dough is hard to work with so I grabbed my ice cream scooper and scooped away - right into my lightly greased muffin tins. I gave each one a little egg wash and sprinkled some turbinado sugar on top and baked.


This is my absolute FAVORITE bread from this cookbook so far.  I spread a little butter on one right out of the oven and I truly wanted to eat half a pan of them.  It was 11:00 at night so I restrained myself and waited until the next morning.  These rolls (I don't know what else you would call them) were the first thing on my mind when I woke up the next day. 

I have some baking in my oven right now, as I am typing this.  My home smells heavenly!!!

Pesto and Pine Nut Bread

The next bread that I baked (although off schedule for the challenge) was the pine nut and pesto bread.  We all liked this bread a lot.  I love anything with basil so it wasn't a hard sell for me.  The dough was very hard to work with even after refrigerating it a couple days.  I had this brilliant idea to make bread sticks but they didn't quite turn out as visually appetizing as I had anticipated.  They tasted great though.  I added a little flavor by brushing some spicy garlic butter on top on top of them after baking .  YUM! 


I also made some buns for barbeque pulled pork sandwiches.  These were messy but delicious!


Avocado and Tomato Bread

One of the other breads I made for the HB in 5 Challenge was the Avocado and Tomato Bread.  I almost didn't make this because I wasn't sure that I would like it, but decided to give it a try.  I added some ingredients to the dough because I wanted some of the traditional guacamole flavors.  Cilantro, minced fresh garlic, and 1 chopped fresh jalepeno pepper (without ribs and seeds) were added to the wet ingredients. 

I made this bread into buns for some jalepeno and lime grilled chicken sandwiches.  We all loved the bread and the sandwiches were excellent!


Check out the other bread from the group Healthy Bread in Five.

Tuesday, March 30, 2010

I Made Cheese!!! Homemade Queso Blanco


Crazy!  I know.  Some people are probably saying, "Why would you make your own cheese?"  My answer would be, "Because I can!" 
I've seen a lot of posts about making cheese lately and I'm also reading Barbara Kingsolver's book Vegetable, Animal, Miracle. She has a part in her book about her adventures making cheese. I knew that I had to try it!
My son was helping me in the beginning but got a little bored and frustrated with the process. The milk wasn't curdling fast enough for him (or me, for that matter). I added a little more vinegar and it curdled much faster.

The result: The cheese didn't have a lot of flavor. I put it into my corn and black bean salsa and it really didn't add that much flavor. If I'm going to add fat and extra calories to my food, it needs to improve the food somehow.

I will probably try this again but add some fresh garlic and peppers or something to it and see how it turns out. My next cheese adventure might just be mozzarella! I will let you know!

Queso blanco
from Homesick Texan

Ingredients

One gallon of whole milk, can use pasteurized or raw but don't use ultrapasteurized
1/2 cup of lime juice (about four limes) or 1/4 cup of white vinegar
Salt to taste

Method:

Heat the milk in a non-aluminum pot on medium-low heat for about 10 minutes or until it looks like it’s just about to boil (but don’t let it boil!). If you’re using a thermometer, the temperature should be 185 degrees.

Add the lime juice. The curds will separate from the whey and the mixture will look grainy, kind of like you’ve just thrown a bunch of corn meal into a pot of skim milk. Let it simmer for a couple of minutes.

Pour the pot’s contents into a cheesecloth-lined colander and let it drain for a couple of minutes.

Sprinkle the curds with salt (you can go saltier than you normally would as a lot of the salt will drain from the cheese as it dries). Now is the time to add any herbs, spices and/or chopped chiles.

Gather the curds in the center, tie the cheesecloth’s ends and hang the cloth on the faucet so it can drain for a few hours.


Monday, March 29, 2010

Great-Grandma's Rich and Cheesy Macaroni


This is my favorite comfort food of all time.  It just makes me feel happy and all warm inside.  The recipe comes from my great-grandmother.  My grandmother used to make this all the time for me and my brother when we were younger.  It was not Christmas or Thanksgiving without a huge pan of it on the table.  Back in my college days, when I would go home for the weekend, I would make a big pot of it and take it back to school with me.  Macaroni would be what I ate all week.  Lots of lovely memories come from this dish. 

It seems odd to some people, but the secret ingredient in Mam-maw's homemade macaroni and cheese is sugar.  Yes, I said sugar and quite a bit of it.  It turns into this rich, buttery, cheesy, happiness in a dish. 

I know that Velveeta is processed cheese.  I know.  I know.  I have made macaroni using several other cheeses and I just don't care for it.   This macaroni is what I judge all other macaronis by.  This is my macaroni. 


Ingredients:

16 oz. elbow macaroni (large or small)
1 box of Velveeta (regular or 2%)
12 tbsp real butter
3/4 to 1 cup of sugar
1/2 tsp salt


Directions:

Preheat oven to 350 degrees.  Chop the cheese into cubes.  Set aside.  Melt the butter in a 9x13 dish and set aside.

Cook the pasta in a large pot of salted water.  Drain pasta completely.  Put pasta back in the pot.

Move the dish with butter around so butter coats the bottom of the dish.  Pour the rest of the butter in the pot with the pasta.  Add the sugar, salt and cheese.  Cook on low until the cheese is melted.  Pour into 9x13 dish and bake for about 30 minutes or until slightly browned and bubbly on top. 

Smoky Kale with Onions


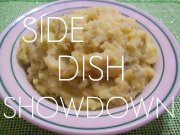
I have been browsing the produce section a little more intently lately because we need to find some vegetables other than potatoes and green beans that my family will eat.  The Side Dish Showdown on Cinnamon Spice and Everything Nice was perfect to help push me into finding new side dishes. 


Side Dish Showdown Blogger Event

I was inspired by Lori of Fake Free Food in the 1st challenge.  She made Smoky Sauted Kale and Mushrooms.  I had never eated kale and decided that we would try it.  I changed up the recipe some.

Result:  My ten year old and husband ate it all- so I guess they didn't hate it.  It wasn't my favorite, but I may try it again some time using some different ingredients. 

This is how I made mine:

Ingredients:

1 tbsp olive oil
1 large bunch of kale, coarsely chopped
1 medium yellow onion, coarsely chopped
3 cloves of garlic thinly sliced
1 tbsp of smoked paprika
1/2 cup of chicken stock
salt and pepper to taste

Heat oil and saute onions until transparent.  Add garlic and paprika and cook for one minute longer.  Slowly add the kale until it's wilted.  Stir in the chicken stock and cover.  Steam the kale for about 5 minutes.  Uncover and stir in salt and pepper.  Cook until the remaining liquid evaporates.

I have linked up this post to Food on Fridays at Ann Kroeker:Writer.  Go check out the other posts!

Sunday, March 21, 2010

Chicken Satay with Spicy Peanut Dipping Sauce


I have always wanted to try Thai food, but for some reason haven't.  Instead of playing it safe and going to a restaurant I decided to cook some myself.  Kevin, at Closet Cooking, posted a recipe and it looked and sounded really good so I gathered all of the ingredients and started cooking.  To say my family was skeptical is an understatement. 

We got 6 inches of snow last night, but I had my son go and shovel the patio just so I could grill this meat.  I know all my neighbors were talking about me but that's okay.  I would have never got the flavor and crispy places on the chicken.  It was well worth my 10 year old's efforts (and me wearing my snowboots and coat). 

The only ingredient that may be a challenge to find is the lemon grass.  While I was in Dallas this past week I went to my favorite store, Central Market.  I love browsing their bulk bins.  I found some dried lemon grass and thought that this would have to work.  I wasn't going to spend a fortune on fresh lemon grass when I could get what I need for 30 cents.  I just rubbed it in between my palms and then put it in the marinade.  Before I put the chicken on skewers I tried to squeeze as much of the marinade off, but of course, some of the lemon grass remained.  It was fine after grilling. 

Result:  I LOVED the chicken!  (My family liked it too...probably not as much as I did, though).  The combination of ingredients gave the chicken such a unique flavor.  I will definitely be making this again.  The spicy peanut dipping sauce was not my favorite.  It was a little rich and really not needed because the chicken already had so much flavor. 

Chicken Satay with Spicy Peanut Dipping Sauce

from Kevin at Closet Cooking
(makes 4 servings)

Ingredients:

2 teaspoons coriander seeds (toasted and ground)
2 teaspoons cumin seeds (toasted and ground)
1 teaspoon turmeric (ground)
2 stalks lemongrass (peeled & chopped)
2 cloves garlic (grated)
1 tablespoon galangal (or ginger, grated)
1 lime (juice and zest)
2 tablespoons fish sauce
2 tablespoons palm sugar (grated or brown sugar)
1 pound chicken (cut into thin strips)
* wooden skewers (soaked in cold water for 30 minutes)
1/4 cup peanut sauce

Directions:

1. Mix the coriander, cumin, turmeric, lemongrass, garlic, galangal, lime, fish sauce and sugar in a food processor.
2. Marinate the chicken in the marinade for up to 4 hours.
3. Skewer the chicken and grill it for about 5 minutes on each side.
4. Serve with peanut dipping sauce (see recipe below)


Spicy Peanut Dipping Sauce

Ingredients:

1 tablespoon peanut oil
1 tablespoon panang curry paste or red curry paste
1/4 cup coconut milk
1/4 cup chicken stock
3 tablespoons fish sauce
2 tablespoons lime juice
2 tablespoons brown sugar
1 tablespoon chili sauce (or 1 birds eye chili, sliced)
2 tablespoons peanut butter
1 teaspoon sesame oil
2 tablespoons peanuts (roasted and crushed)

Directions:

1. Heat the oil in a pan.
2. Add the panang curry and saute until fragrant.
3. Add everything else and simmer to thicken it a bit, about 2-3 minutes.
Saturday, March 20, 2010

Chocolate Chip Coconut Molten Cookies


I found this recipe for Mint Chocolate Chip Truffles Molten Lava Cookies at Baking and Boys! I found it several months ago and have been on the hunt for either the mint truffle Hershey Kisses and/or the Truffle Hershey Kisses.  I cannot find them ANYWHERE!  I have to go search the candy aisle of any grocery-type store these days because I want these Hershey Kisses and no one has them.  One positive in this search is that I found Coconut Cream Kisses.  I decided that I would have to settle with these.  (They are some kind of yummy BTW!)

These are really easy cookies because you can use any chocolate chip cookie recipe that you want.  You put some cookie dough on the bottom of a ramekin then stuff 3 kisses in.  Last, you cover up the kisses with more cookie dough. Bake and when you cut into this little treat, the Hershey Kisses oozes out . It was extremely rich- even more so with the ice cream added on top- but I never have a problem with that. 

I decided to use the recipe Katrina provided on her website.  I only made 4 of the large cookies in the ramekins.  I made regular sized cookies with the rest of the dough (umm..except for all the cookie dough I ate before the cookies got made several days later). 

INGREDIENTS

1 cup unsalted butter at room temp
1 cup tightly packed light brown sugar
1/2 cup granulated sugar
2 large eggs
1 1/2 tsps. pure vanilla extract
3 cups plus 2 tbsp. all-purpose flour
1 tsp. baking soda
1/2 tsp. salt
16 oz. flavorful bitter or semi-sweet chocolate, coarsely chopped (I used chunks)
INSTRUCTIONS

1. Preheat oven to 350 F. Spray 4-6 ramekins with nonstick spray.  In the bowl of an electric mixer, or stand mixer fitted with paddle attachment, or a large bowl if mixing by hand, cream the butter and sugars until light and fluffy. Add the eggs, one at a time, beating well and scraping down the sides of the bowl after each addition. Beat in the vanilla.

2. Sift the flour, baking soda and salt together in a small bowl. Add the dry ingredients to the butter-sugar mixture, and mix until just combined. Fold in the chocolate chunks.

3. Press some dough into the bottom of several ramekins.  Press 2-3 Hershey Kisses into the dough.  Add enough cookie dough to cover the Kisses.  Place the ramekins onto a cookie sheet and place into preheated oven. 

4.  Bake for 14-17 minutes or until the tops are a light golden brown. If the cookies are neither firm nor dark when they are removed from the oven, they will cool chewy and soft. Cool the cookies on the sheets for 5 minutes, then transfer to wire racks to cool completely.

Thursday, March 18, 2010

Grilled Spinach and Ricotta Stuffed Chicken


I was inspired by Gina at Gina's WW Recipes when I saw her recipe for Spinach and Feta Stuffed Chicken Breasts.  I took her idea and came up with my own recipe.  I had some low-fat ricotta cheese and frozen spinach so I decided to use that.  This was the first time I stuffed chicken with anything so I was a little nervous but I was so pleased with the result. 

The weather was beautiful in Topeka today so I HAD to grill.  I am so tired of being stuck inside and smoking up the house every time I try to cook meat on the stove.  I was afraid that the filling would ooze out onto the grill but it didn't!  I pinned each one shut with some toothpicks I soaked in water for an hour or so.  I can't even tell you how excited I was about this dish!  It turned out to be the prettiest piece of chicken I have ever cooked AND quite delicious if I do say so myself.

Grilled Spinach and Ricotta Stuffed Chicken

1/2 tbsp garlic, finely chopped
1 tbsp shallots, finely chopped
1 tbsp olive oil
1/2 cup low fat ricotta cheese
1 cup chopped frozen spinach, thawed and squeezed
4 large chicken breasts, pounded to 1/4 inch thick
salt and pepper to taste

Directions:

In a nonstick pan saute garlic and shallots for one minute in the olive oil.  Add chopped spinach and mix well.  Remove from heat and stir in cheese until well combined.  Add salt and pepper to taste.

Heat a grill or grill pan to medium high heat.

Lay out the chicken breasts and spoon a tablespoon or two of the filling onto one side of each of the chicken breasts.  Fold over the empty side of the chicken breast and pin closed with toothpicks.  Drizzle some olive oil over the chicken and sprinkle some salt and pepper on to each piece.  Grill chicken for 10 minutes on each side or until cooked through. 


Wednesday, March 10, 2010

HBin5 Catch-up Post

I joined a group called Healthy Bread in Five based on the book:  We are working our way through the book, but I haven't done very well so far.  I've missed several of the recipes.  I am going to try to get caught up on some of them here.


These are the red beet buns from the book.  I have never even touched a beet before so I was a little hesitant but excited about baking the this bread for the HBin5 challenge. They are the most beautiful vegetable when you cut them up. The vibrant red juice goes everywhere and stains everything in its path, but it's okay because it is so pretty! I didn't really care for the smell, though. They kind of smell like dirt. I was just hoping the whole time that they wouldn't actually taste like dirt.


Instead of grating the beets (laziness) I chopped them some and threw them into the food processor to chop. I wish I would have left them in there a little longer and made more of a puree, because there ended up being some larger chunks throughout the dough.


The dough turned this gorgeous purple color after resting in the refrigerator for 48 hours.

I took the rolls I made to work for "Red Food Day" in honor of Valentine's Day.  I didn't tell anyone what they were and just put them in a bowl with a stick of butter set in front of it.  There were only a couple left by the end of the day (out of about 18). 


I thought they were pretty good.  I don't know that I will ever make them again, but I may attempt to cook beets in a different way. 


Southwestern Focaccia with Chicken, Feta and Onions


One of the challenges for March is the Southwestern Focaccia with Roasted Corn and Goat Cheese.  I had to change this a lot so my family would eat it.  I traded feta for goat cheese because I knew my child would not go near goat cheese.  I also didn't use the corn- didn't sound good to me.  So in other words, I made this recipe my own.  I used the Whole Wheat Bread with Olive Oil recipe from the book and made it into a free form pizza crust.


It turned out really good, but it was very spicy.  I shouldn't have put the entire 1-1/2 tsp of ground ancho chile powder in the sauce.  It was way too spicy for us (we're kind of wimpy when it comes to heat). 

The last post I will make for now is the loaf of Whole Wheat Bread with Olive Oil I made.  I am still getting used to the homemade whole wheat bread taste.  I wish it tasted a little more like some of the store bought bread I buy sometimes.  I just haven't found the recipe that I absolutely love.  BUT I will keep trying.  One loaf at a time.


Monday, March 8, 2010

Corny Dog Muffins


I have been searching for a recipe for a healthy lunchbox meal for my son that he will actually eat. Up until now, the search has been futile.  I saw this idea on Lynn's Kitchen Adventures and knew that I had to try it.  I didn't use the recipe that she used but took the idea and ran with it.  I used the recipe for the cheddar and jalepeno buttermilk cornbread I made last month.  I changed a few things to make it a little healthier. 

This recipe made 36 mini-muffins.  That's a lot of lunches and after school snacks!  I let them cool and put 4 to a baggie.  I put several baggies in the refrigerator and the rest in the freezer. 

The results: they were very tasty right out of the oven and at room temperature.  My son's comment after school was, "my lunch was really good, Mom!"  He did request some marinara sauce to dip them in next time.  I know he's gotta be happy about having an alternative to PBandJ.

Ingredients:


1/4 cup butter
1/4 cup white sugar
1/4 cup Splenda
1/2 cup Egg Beaters
1 cup buttermilk
1/2 teaspoon baking soda
1 cup cornmeal
1 cup white whole wheat flour
1/2 teaspoon salt
4 ounces sharp cheddar cheese chopped in small chunks
1/4-1/2 cup jalapeno or poblano pepper finely chopped (optional)
6 hot dogs cut into bite-sized pieces (I used light turkey hotdogs)

Directions:

1. Preheat oven to 375 degrees F (175 degrees C). Spray mini-muffin pans with nonstick spray.

2. Melt butter in microwave and stir in both sugars. Quickly add eggs and beat until well blended. Combine buttermilk with baking soda and stir into butter and egg mixture. Stir in cornmeal, flour, and salt until well blended and few lumps remain. Fold in cheese and peppers. Pour batter into the prepared pan (about 3/4 full). Push a hotdog piece into the batter of each cup.

3. Bake in the preheated oven for 20-25 minutes, or until a toothpick inserted in the center comes out clean.


Sunday, March 7, 2010

Chicken and Dumplins

I ate chicken and dumplins a lot as a child.  I found this recipe several years ago in a cookbook by Sandra Lee from the Food Network show, Semi-Homemade.  It's not like my mom's, but I love it.  This is one of my son's favorite dinners I make.  Any time it's cold outside, he says "it's a perfect chicken and dumplins day."  It's a great meal any time of the year, actually.


It's a simple recipe because of all the premade ingredients like the store bought roasted chicken and canned biscuits for the dumplings.  The original recipe calls for the frozen, prechopped vegetables so you could definitely use those.


Chicken and Dumplings
(adapted from Sandra Lee)

Ingredients:

1 whole store bought deli roasted chicken
2 tbsp vegetable oil
1/2 cup chopped onions
1/2 cup chopped celery
1/2 cup chopped carrots
6 cans (14 ounces each) chicken broth
2 tsp poultry seasoning
1 tsp salt
1/2 tsp black pepper
All pepper flour, for dusting
1 container refrigerated buttermilk biscuit dough (I like Pillsbury Grands)
1 can (10.5 ounce) condensed chicken gravy

Directions:

Remove skin and bones from chicken; shred meat into large pieces. Set aside.

In a large heavy pot or Dutch oven, heat oil over medium heat. Add onions, carrots, and celery. Cook until soft, about 10 minutes.

Add broth, poultry seasoning, salt, pepper, and chicken. Bring to boil. Reduce heat and simmer for 30 minutes.

While stew simmers, prepare dumplings. On a flour-dusted surface, roll each biscuit 1/4 in thick. (I just stretch them out with my hands.) With a pizza cutter or sharp knife, cut biscuits into 1 inch wide strips. Set aside.

Skim off any scum that has risen to surface of soup. Stir in chicken gravy. Stir in dumplings, a few at a time. Cover with a tight-fitting lid and simmer for 10 minutes more. Ladle into bowls and serve piping hot.


Saturday, March 6, 2010

Blackberry Yogurt Muffins


I needed to get in the kitchen and bake something this morning.  Baking is very therapeutic for me.  It calms my soul and allows me to create.  I used to scrapbook and make cards as my creative outlet, but I haven't done that in quite a while.  Now, I create in the kitchen.  What can be better than creating something yummy that you can eat? 

These muffins were delicious minus the terrible batch of blackberries I used.  YUCK!  I used some frozen blackberries I had and they were sour and had a yucky flavor.  I plucked out the berries and loved the muffin!  They were moist and very flavorful due to the vanilla yogurt I added.  I used half AP flour and half white WW flour in order to make it a little more nutritional.   I will make these again, but will probably use blueberries instead of blackberries.

I found this recipe at The Bad Girl's Kitchen. She adapted the recipe from The Pioneer Woman.

Blackberry Yogurt Muffins

3 cups minus 2 tablespoons flour (I used 1/2 AP flour and 1/2 white WW flour)
1 teaspoon baking soda
2 teaspoons baking powder
1/2 teaspoon salt
1/2 teaspoon nutmeg
1 cup sugar (I used 1/2 cup sugar and 1/2 cup Splenda)
1/2 cup vegetable oil
1 egg
1 generous, heaping cup plain yogurt (I used vanilla yogurt)
2 cups blackberries
1 teaspoon vanilla
Softened butter, for muffin pan
Raw sugar


Preheat oven to 375 degrees. Generously butter muffin pan.

In a large bowl stir together flour, baking soda, nutmeg, baking powder, and salt. Set aside.

In another large bowl whisk together sugar, oil, vanilla, egg, and yogurt. Add the dry ingredients and stir gently until just combined. Be careful not to over-mix.

Add blackberries, reserving 1/2 cup, to mixture and gently fold in.

Add mixture to well-buttered muffin pans. Top each muffin with 2 or so berries. Sprinkle raw sugar over top.

Bake 20 to 25 minutes and allow to cool completely.

Tuesday, March 2, 2010

Homemade Flour Tortillas


So, tonight was going to be a chicken enchilada soup night.  We have had it several times lately and I knew I needed to add something a little different to the meal.  I was browsing food blogs and came across a recipe at Two Girls and an Appetite for homemade tortillas.  They seemed easy and quick enough so I decided to give it a try.  Using my food processor instead of blending the shortening with a pastry blender made it so much easier.  I threw it all in the food processor and mixed it enough that I could work with it on a floured board.  They rolled out smoothly and cooked rather fast.  They were super tasty and I will for sure be making these again very soon. 

There was one thing about these tortillas that was not so great...I couldn't stop eating them.  Maybe my lack of self control and eating all of this yummy food I find on blogs is the reason my butt doesn't want to fit right in my pants anymore....hmmm.....

Flour Tortillas

2 Cups Flour (I used white whole wheat flour)
3/4 Teaspoon Baking Powder
1 Teaspoon Salt
1/4 Cup Shortening
3/4 Cup Warm Water

Stir flour, baking powder, and salt together. Cut in shortening with a pastry blender until mixture is crumbly. Add warm water to make medium stiff dough. Form dough into a ball and knead on floured surface until smooth.

Divide dough into 8 balls, roll into circles and place on non-greased hot pan. Cook until lightly brown with flecks on one side. Turn and cook other side.

Monday, March 1, 2010

Light 'n' Tender Wheat-Oat Pancake and Waffle Mix


I have a passion for pancakes.  It's one of my favorite comfort foods.  I get a craving for them and HAVE to have them.  I just don't like the guilt that comes along with them.  I found this recipe and decided to see if these healthy pancakes would satisfy my occasional craving.  They were definitely great pancakes- not at all healthy tasting.  What's great about this recipe is that it makes a bunch of the mix and you put it in a baggy or container and store it in the freezer.  The pancakes were good so I decided to make waffles using the mix.  I added a tsp of vanilla extract and substituted some vanilla yogurt for some of the buttermilk (I didn't have enought buttermilk.)  I made extra waffles and put them in the freezer so we would have a fast breakfast to pull out and put in the toaster quickly in the mornings.  They were so much better fresh out of the toaster!  They were crunchy and oh, so satisfying!  Spread a little butter, sprinkle some cinnamon sugar on top and add some sliced bananas and you have a super delicious way to start your day. 

Give this recipe a try! 

This recipe comes from the cookbook, King Arthur Flour Whole Grain Baking. You can also find it on their website King Arthur Flour.


Printable Recipe

Light 'n' Tender Wheat-Oat Pancake and Waffle Mix
 3 1/2 cups (12 1/4 ounces) old-fashioned or quick rolled oats
4 cups (1 pound) King Arthur whole wheat flour, traditional or white wheat
1 cup (4 1/4 ounces) King Arthur Unbleached All-Purpose Flour
3 tablespoons (1 1/4 ounces) sugar
3 tablespoons (1 1/2 ounces) baking powder
1 tablespoon salt
1 tablespoon baking soda
3/4 cup (5 1/4 ounces) vegetable oil

To make the mix: Grind the oats in a food processor until they're chopped fine, but not a powder. Combine the oats, flours, sugar, baking powder, salt, and baking soda in a large bowl, preferably the bowl of an electric mixer. Mix on low speed, and drizzle the oil into the bowl slowly while the mixer is running. When all the oil has been added, stop the mixer and squeeze a clump of the mix in your hand; if it holds together, it's just right. If it won't hold together, stir in 1 tablespoon of oil at a time, until it does. Store indefinitely in an airtight container in the freezer.

To make the pancakes: Whisk together 1 cup (4 3/8 ounces) mix, 1 cup buttermilk (or 1/2 cup each yogurt and milk), 1 tablespoon orange juice, and 1 large egg. Don't worry if the batter seems thin at first; it'll thicken as it stands. Let the batter stand for 15 minutes before cooking.

Heat your griddle or pan till a drop of water sputters when you drop it on the surface. Lightly grease, and pour pancake batter by the 1/4-cupful onto the griddle. A muffin scoop works well here. Cook the pancakes till they're golden brown on the bottom, flip them over, and cook till golden brown on the other side. Serve with butter and syrup; fresh fruit is a plus, of course. Yield: 10 medium-sized (3 1/2") pancakes.

For waffles, try this with each cup of mix: reduce the amount of milk by 1 tablespoon and increase the amount of oil to a total of 2 tablespoons plus 2 teaspoons.

Note: These pancakes are so tender and moist, they're even good cold (not refrigerator cold; room-temperature cold). Just spread with a little jam, roll up, and enjoy.