Tuesday, August 10, 2010

Back to School - Be Back Soon!


Well, it's that time of the year.  Teachers had to be back at work yesterday and students come next Monday.  This week is full of meetings, training and getting ready for kiddos. 

I will start posting again as soon as I get some time and I actually cook something blog-worthy (which hasn't been happening much lately). 

Until then!


Tuesday, August 3, 2010

Almost Guilt-free Alfredo Sauce


One of my favorite pasta dishes is chicken or shrimp alfredo.  It is rich and creamy and full of fat and calories.  I've been working on my own recipe for a healthy version of this dish but haven't quite mastered it yet. 

When I came across this recipe on The Gracious Gourmet I didn't believe it could work.  There was no way it could be this easy and delicious.  The secret to Tiffany's recipe is cottage cheese.  Yes, cottage cheese.  To tell the truth I had never tried cottage cheese until this past week.  The texture of it has always turned me off.  I have a feeling there are a lot of people that feel the same way.  I was brave and tried it.  Believe it or not, it is really good.  It tastes like little bits of cheese in tangy cream.  I'm going to have to do some more research to find out how it is good for you.  It doesn't really taste like it should be. 

This sauce couldn't be any easier.  It turns out to be thick and rich and it's a very good option if you are watching your wasteline.

This made a lot of sauce so you may want to half the recipe.  Now, I just need to come up with another use for the leftovers.

Almost Guilt-Free Alfredo Sauce
adapted from The Gracious Pantry

Ingredients:

2 16 oz containers of lowfat cottage cheese
1 cup grated parmesan cheese
1 tsp garlic
1 tsp dried basil
1 tsp dried rosemary
1/4 lowfat milk

Directions: 

Combine all ingredients in a saucepan.  Heat until the mixture warms and bubbles for about 5 minutes.  Transfer the warm mixture to a blender or food processor.  Process until the mixture becomes smooth.  Add a little more milk if it is too thick.  Pour back into the pan and heat until hot and bubbly.  Add salt and pepper to taste.  Pour over cooked pasta.  Add some grilled chicken and steamed broccoli if desired. 


This post has been linked to:
24TbadgeGIRLICHEF 

                                           Tuesday Night Supper Club


and What's on the Menu Wednesday at Dining with Debbie

Thursday, July 29, 2010

Cook the Books- White on White Cake


Several months ago, I found a food blog that combined two of my passions, reading and cooking.  The blog is Cook the Books.  Each month one of the hosts, Rachel, Debbie or Jo chooses a novel that is entwined with food.  Those that choose to participate read the book, cook something inspired by the book and then blog about it. 


This is a heart-warming story about a group of people that come together on Monday nights for a cooking class at Lillian's restaurant. Through cooking, food and each other, these individuals find passion, hope and friendship.

The characters and story made me feel many different emotions as I was reading.  The most prevalent emotion was envy.  I know, crazy right?  Well, I would love to have an opportunity like these characters had.  A cooking class by a professional chef and restaurant owner. Wow!  I have taken one cooking class before (one night only) with my sister in law and it was such a great experience that I will remember forever.  I still make the recipes I learned from that evening. 

One of these days..........

Maybe some day I will win the lottery, quit my job and go to culinary school.  Who knows?  Big dreams....

So, my contribution to this month's Cook the Books is a White on White cake.  I loved the way the author described the cake and all of its simplicity in the story.  To tell you the truth, I had trouble with this simplicity when I was making the cake.  When I bake, I like to go "all out".  If I'm going to bake something this unhealthy then it's going to be full of vibrant flavors and ingredients.  I wanted to put lemon curd between the layers.  I wanted to add something because it was just going to be white and vanilla flavored.  Sounded pretty boring to me.  Needless to say, I restrained myself so it stayed true to the white cake with white icing as in the story.  I did add some lime extract to the icing, though. I needed some more flavor.  I know...I'm weak.  That's okay.  It turned out incredible.  and beautiful! 


The recipes come from Cake Love by Warren Brown.  The cake is a white butter cake and the icing is an Italian Meringue Buttercream.  I will be posting the recipes in a couple days.  We decided to take a last minute road trip to St. Louis this weekend so I will be adding the recipes when I get back. 


Wednesday, July 28, 2010

Orange and Vanilla Dreamsicle Cookies


These are some of the most tasty cookies I've ever made.  They aren't healthy in any way, but I like to splurge a little sometimes.  These are definitely worth it!

Orange and Vanilla Dreamsicle Cookies
adapted from Baked Perfection

1 1/2cup all purpose flour
1 white whole wheat flour
1/2 tsp salt
1 cup butter, softened
1/2 cup sugar
1/2 cup firmly packed brown sugar
1 large egg
1 tsp vanilla extract
2 tbsp orange zest
2 cups vanilla chips

Preheat oven to 375 degrees.

Combine flour, baking soda, and salt in a small bowl.

Cream butter and sugars until light and creamy.  Beat in vanilla and egg until smooth.  Gradually add flour mixture until combined.  Stir in orange zest and chips.

Drop rounded teaspoons onto ungreased cookie sheets.  Bake 8-10 minutes or until golden brown around the edges.  Cool for several minutes on the cookie sheets before transferring them to cooling racks. 

Sunday, July 25, 2010

16 Spice Shredded Beef Enchiladas with Zucchini and Onions


Tacos are one of my fast and easy "go to" meals.  I have always used ground beef until I recently tried cooking a beef chuck roast in the crockpot for my taco meat.  Check out the Tacos de Barbacoa recipe here.  I wanted to use the same concept but with a different spice rub.  I chose Bobby Flay's 16 Spice Rub.  I made this spice blend a while back and still had a lot left.  It was perfect for this meal.  I know 16 spices looks a little intimidating, but many of them I already had.  You could use any spice mixture that you want and still make these enchiladas.  But, I challenge you to make the 16 spice rub sometime.  It is really delicious.  It has some heat but also some warm and earthy flavors from the allspice, cinnamon and cloves.

I made this recipe up as I went along.  I don't post many of the meals that I make simply because they are usually just thrown together.  I had a good feeling about this one so I actually wrote things down as I cooked. 

My husband was skeptical when he walked in the kitchen and the enchiladas did not look like the usual covered-in-cheese-and-meat ones we have cooked for the past 15 years. These were plain on top.  I decided to bake the enchiladas without sauce on top because I knew the salsa I planned on using would make them soggy as they baked.  They were not filled with the old standard meat and cheese of the old days.  These were filled with shredded beef, onions, peppers, a little sour cream and cheese, and guess what...zucchini.  Yes, zucchini.  I've learned that zucchini can be a great filler and make a meal go a lot farther.  AND add some nutrition.  They don't have a lot of flavor so they are perfect for this. These enchiladas are stuffed full, but not with a lot of fat and bad-for-you stuff.

These enchiladas were a hit!  My husband even apologized later for judging and jumping to conclusions before he had eaten them.  WOW!  (That doesn't happen too often and it made me feel good).  He ate them for lunch the next day and said they were great reheated, too. 

The roast that you cook is enough for two meals.  I made tacos one night and these enchiladas the next night. 

Bobby Flay's 16 Spice Rub and Roast

3 tablespoons ancho chile powder (heat level: 4)
3 tablespoons pasilla chile powder (heat level:4)
3 tablespoons ground cumin
3 tablespoons ground coriander
3 tablespoons ground ginger
2 tablespoons garlic powder
2 tablespoons onion powder
1 tablespoon allspice
1 tablespoon cinnamon
1 tablespoon ground cloves
1 tablespoon ground fennel seed
1 teaspoon chile de arbol – can substitute cayenne (heat level:7)
3 tablespoon brown sugar
2 tablespoons kosher salt
2 tablespoons coarsely ground black pepper
1 teaspoon cayenne pepper (heat level:8)

4 lb beef chuck roast
1 large onion, sliced
1/2 cup water or beef broth

In a small bowl stir all spices together.   Rub on all sides of the roast; rub in with your fingers. If you can, put it in the refrigerator for a while (I let it sit for about 2 hours).

Place in a 5 to 6 quart slow cooker with broth. Add sliced onions on top of the roast.  Cook, covered on low-heat setting 10-12 hours or until tender. (I cooked mine for about 8 hours and it was perfect).


Enchiladas
 
1 cup chopped onions
1 cup zucchini, chopped fine
1/2 cup poblano pepper, chopped
1 jalepeno, chopped
3 cloves of garlic, chopped
salt and pepper to taste
1-2 tbsp olive oil
1/2 cup lowfat sour cream
1 cup cheese, grated (cheddar or monterey jack)
12 corn tortillas
4 cups of salsa
 
Directions:
 
Preheat oven to 350F.  Heat a large nonstick pan to medium high heat.  Add olive oil.  Add onions, zucchini, and peppers. Cook for about 7 minutes or until the onions start to turn translucent.  Stir in the garlic and cook for about 2 minutes.  Add salt and pepper to taste. Remove from heat.  Stir in cheese and sour cream.  Set aside. 
 
Cover two cookie sheets with foil or spray with nonstick spray.  Lay out tortillas on the pans in a single layer.  Spray lightly with cooking spray.  Place pans in the oven and cook for about 4 minutes. 
 
Spray a 13x9 baking dish with nonstick spray.  Spread about 2 tbsp of zucchini mixture on one of the warm tortillas and add some of the shredded taco meat.  Roll up the tortilla and place in the pan seam side down.  Repeat with the rest of the tortillas.  Cover pan with foil and bake for 30 minutes. 
 
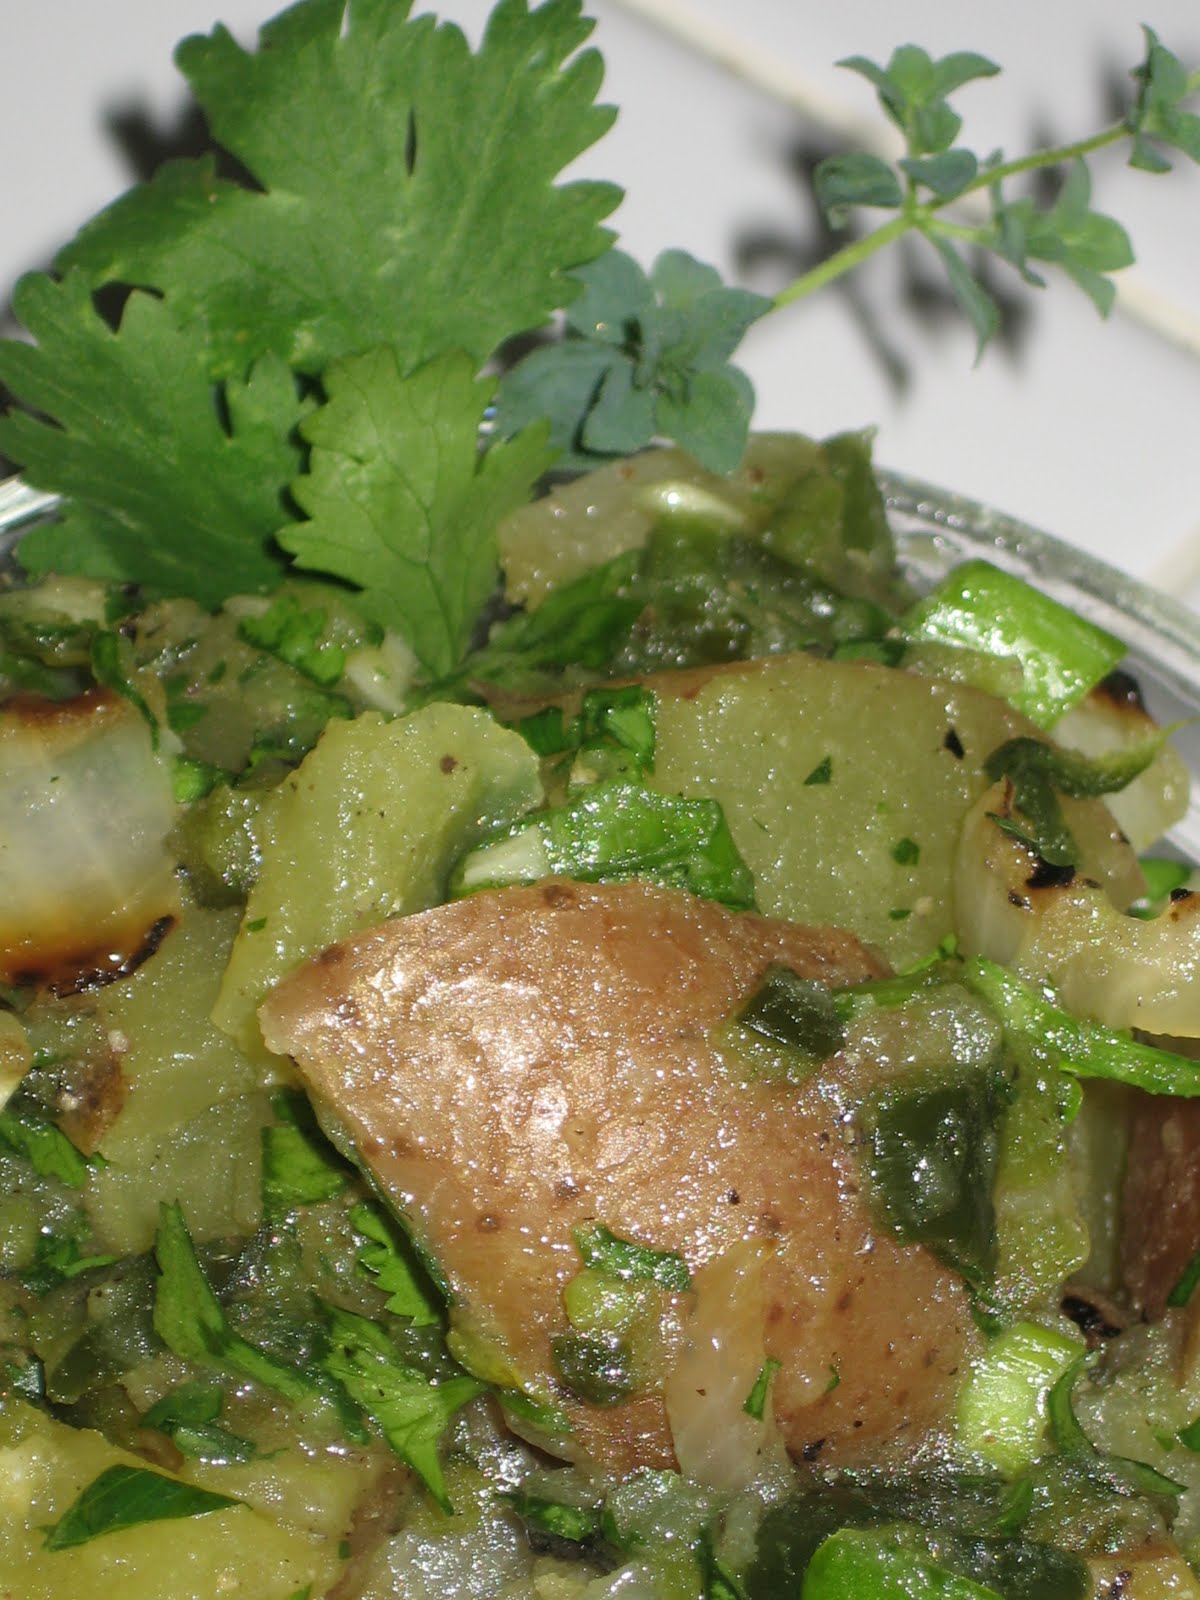
Serve the enchiladas with warm salsa on top. 


I have linked up this post to Just Something I Whipped Up at The Girl Creative.

The Girl Creative

Thursday, July 22, 2010

Oregano and Garlic Stuffed Jalapenos


These are delicious!  I could eat a whole tray of them.  I added a little spin to the ones I usually cook by including some fresh oregano and garlic. 

Ingredients:

4 ounces low fat or nonfat cream cheese, softened
1 tbsp oregano, chopped
1 clove of garlic, chopped
3-4 slices of turkey bacon, cut into 1 inch pieces
6 jalapenos, cut in half, seeds and ribs removed

Directions:

Preheat the oven to broil.  Mix the cream cheese, oregano and garlic together in a small bowl.  Stuff the peppers with the cheese mixture and top each with a piece of cut bacon.  Place peppers in a greased pan and broil until the bacon is cooked.  Serve warm.

Tuesday, July 20, 2010

Lemon Berry Bars


I get in the mood to bake.  I have been in this mood a lot lately and this doesn't go well when I am trying to feed my family healthier.  Typically what I do is bake something, give my family one serving of the treat and send the rest to work with my husband. 

These bars were completely delicious!  The guys at my husband's work sang high praises of it, according to my husband. 

I found the recipe at Twopeasandtheirpod.com.  I changed up the crust some due to what I had on hand.  I needed to use up this package of cookies and thought it would be great combined with the graham cracker crumbs.  The results were scrumptious!


For the crust:

1 cup graham cracker crumbs
1 cup Pepperidge Farms Chessman cookies, crushed
6 tbsp unsalted butter, melted
1/4 cup sugar
zest of one lemon

For the filling:

2 lg. egg yolks
1- 14 ounce can fat free sweetened condensed milk
1/2 cup fresh lemon juice
1 tsp lemon zest
10 ounces fresh berries (raspberries, blackberries, blueberries)

Preheat the oven to 350 degrees.  Spray an 8x8 baking dish with cooking spray.  Set aside.

In a medium bowl, combine the graham cracker and cookie crumbs, melted butter, sugar and lemon zest.  Stir until crumbs are moist.  Press crumbs into the prepared pan, pressing the crust mixture one inch up the side of the pan.  Bake for 10 minutes.  Remove from oven and allow to cool to room temperature. 

Once the crust is cool, combine the egg yolks and condensed milk until well mixed.  Stir in the lemon juice and lemon zest.  Stir until mixture begins to thicken slightly.  Gently fold in the berries.  Fold carefully so you don't break the berries.

Pour the lemon berry filling evenly over the crust.  Bake for 15 minutes or until set.

Cool to room temperature, then chill for at least one hour before serving.  Cut into bars and serve.  Keep bars in the refrigerator up to five days (if they last that long). 


Friday, July 16, 2010

Peanut Butter Banana "Tacos"


I saw this idea in the Clean Eating magazine I think.  This makes a perfect snack, breakfast and I even thought about putting it in my son's lunchbox.  He loved them!

I spent the past week taking care of my 4 nephews while my brother and sister-in-law went on a fabulous cruise in Mexico.  I could not wait to make these for the kids.  They were a huge hit!  (We came up with the banana taco name together.)  What makes it even better is that they are healthy. 

They are very simple to prepare and cook. 

Ingredients:

bananas
honey or agave nectar
natural peanut butter
whole grain flour tortillas
butter

Directions:

Spread about a tablespoon of peanut butter on the tortilla and lay the banana in the center.  Drizzle a little bit of honey or agave over the banana.  Roll it up.  Spread a little softened butter (it doesn't take much) around the outside of the rolled up "taco".  Heat a large nonstick pan to medium high heat.  Place the taco(s) in the heated pan.  Cook and roll them in order to brown on all sides.  Enjoy warm or at room temperature. 


I have linked this post to Foodie Friday at Designs by Gollum  and Wholesome Whole Foods at Health Food LoverGo check out all the great recipes and ideas!

Friday, July 9, 2010

Tacos de Barbacoa in a Crockpot


I cook a lot of Mexican food.  I love the flavors of the chiles and spices.  I really miss having good Mexican food living in Kansas.  What the people here say is wonderful Mexican food is terrible to me.  ICK!  So, I end up making my own.  Usually I end up creating my own dishes, but I recently bought this special edition magazine that has tons of great looking recipes. 


The recipe in the book and the original version of this dish is supposed to be smoked.  I don't have a smoker so the book said that you could do it a crockpot.  I can't imagine how yummy it be if it were to be smoked in banana leaves. YUM!

In the old days, prior to my obsession with eating healthy I used to fry the corn tortillas in vegetable oil.  Talk about bad for you!  Now, I have found a more healthful way to cook the tortillas.  I lightly coat a nonstick pan with nonstick spray and throw the tortillas in (one at a time) and cook till slightly bubbled on one side.  Flip and cook for about 20 seconds longer.  They are perfect!  I can now eat a taco without grease running down my arm.  (I know- gross, right?)

This was so easy and delicious and I can't wait to make it again.   Maybe this Sunday when I have family coming over?!? 

Oh!  and the leftovers made a perfect wrap for our roadtrip to Texas. 

Ingredients:

2 tbsp cider vinegar or red wine vinegar
4 cloves garlic, minced
2 tsp dried oregano, crushed
2 tsp chili powder (I used ancho chile powder)
1 1/2 tsp salt
1 1/2 tsp cracked black pepper
1/4 tsp ground cinnamon
1/8 tsp ground cloves
1  4 lb beef chuck roast
1/4 cup beef broth or water
corn tortillas

possible toppings: shredded lettuce, chopped tomatoes, salsa, quacamole, crumbled queso fresco, and/or fresh cilantro

Directions:

In a small bowl stir together the vinegar, garlic, oregano, chili powder, salt, black pepper, cinnamon, and cloves to make a paste.  Spoon spice paste on all sides of the roast; rub in with your fingers.  If you can, put it in the refrigerator for a while (I let it sit for about 2 hours). 

Place in a 5 to 6 quart slow cooker with broth. Cook, covered on low-heat setting 10-12 hours or until tender.  (I cooked mine for about 8 hours and it was perfect). 

I have linked up this recipe to the following blogs:


New Friend Fridays

Wednesday, July 7, 2010

Hasselback Potatoes


My family loves potatoes and we could eat them with every meal.  I saw this idea here and decided that I could always use a new way to prepare and serve potatoes.  They were very good and kind of fun to make!

Ingredients: 

potatoes
fresh garlic, thinly sliced
sea salt
freshly ground pepper
Italian seasoning
butter

Directions:

Heat oven to 350 degrees.  Carefully slice potatoes as seen in the photo above.  Be careful not to slice all the way through.  Slide garlic slices in between the layers of potatoes.  Drizzle olive oil over the top and sprinkle with salt, pepper and Italian seasoning.  Bake for about an hour or until the potatoes are tender.  Remove from oven and top with a pat of butter and sprinkle a little more Italian seasoning on top.  Add sour cream and chives if desired. 

Monday, July 5, 2010

Broccoli with Garlic, Almonds and Asiago Cheese


This is one of my favorite side dishes and we eat it rather often.  It is super-easy, quick and rather healthy with a small amount of cheese added.  I think I got the idea years ago from Rachael Ray. 

The broccoli that I used was a great find at the local farmers market.  $1 a head!  Great prices, fresh and local!  Love it!

Ingredients:

2 lbs of fresh or frozen broccoli cut into spears
5 cloves of garlic, minced
2 tbsp olive oil
1/4 cup sliced almonds
1/2 cup asiago cheese, grated

Directions:

Steam the broccoli.  Set aside.  Heat a large, nonstick pan to medium high heat and add olive oil.  Add garlic and cook for 30 seconds.  Add the broccoli and almonds and toss all together.  Cook for about 2 minutes.  Remove from heat and top with the cheese.  Cover with foil if needed in order to melt the cheese.  Serve.


Side Dish Showdown Blogger Event

I am also linking this post to the following:

All the Small Stuff - Tuesdays at the Table
Balancing Beauty and Bedlam - Tasty Tuesday
GirliChef - Two for Tuesdays
Foodie Friday - Designs by Gollum

Thursday, July 1, 2010

Sweet Blueberry Blue Cornbread


I think this dessert looks a little patriotic with the red, white and blue.  Perfect for the 4th of July!  It turned out very yummy.  I love the texture of the blue cornmeal and the yogurt added a little twang and lots of moisture.  You need to try this recipe!  It was very different but good.

It is not too terribly sweet, so if you want it sweeter you may want to add more sugar.  Maybe this would be even better simply with a little butter on top instead of the strawberries and cream.  They were almost too sweet for the mild cornbread. 
I found the recipe on Paula Deen's website.  I changed the recipe trying to make it a little more healthful.  Here is the original recipe. 

Sweet Blueberry Blue Cornbread
adapted from Paula Deen

Ingredients:

1 cup white whole wheat flour
1/2 cup all purpose flour
2/3 cup sugar (I used part Splenda and part sugar)
1/2 cup blue cornmeal
1 tablespoon baking powder
1/2 teaspoon salt
1/4 cup milk
1 cup plain yogurt
2 large eggs, lightly beaten (I used Eggbeaters)
1/3 cup canola oil
4 tablespoons butter, melted
1 cup fresh or fresh frozen blueberries
1 tbsp vanilla extract
strawberries and whipped cream for garnish if desired

Directions

Preheat oven to 350°F. Spray an 8” square baking pan with non stick baking spray and set aside.

In a medium mixing bowl, whisk together flour, sugar, corn meal, baking powder and salt. In a separate large mixing bowl, whisk together milk, yogurt, vanilla, eggs, oil and butter. Add flour mixture to wet mixture and stir just until blended. Gently fold in blueberries.

Pour into prepared baking pan. Bake for 35 minutes or until wooden pick comes out clean. Serve warm with strawberries and whipped cream.


This post is being linked to Ultimate Recipe Swap @ Life as Mom.

and

New Friend Fridays

Wednesday, June 30, 2010

Chocolate Mint Water, Goodbye Diet Coke and My New Friend Stevia


It's official.  I have not had a Diet Coke in two weeks now.  I am a fiend when it comes to this wonderfully delicious, bad for you drink.  Early Morning Large $.99 large drinks and Happy Hour at Sonic are some of my favorite times of the day.  I am addicted to the drink. 

I decided to stop drinking it once and for all.  At least I said, "Let's see how long I can go without one."  I have known for a long time now that aspartame is terrible for you.  It's poison on our systems but my family and I consume it in great quantities.  After I watched this video (see below) on Underground Wellness on YouTube, I knew that I needed to make some changes. 


 I have to say, water is very boring especially when you are used to the fizzy flavorful soda.  I have found something that helps break up the boredom of plain water.  Liquid Stevia.  Flavored Liquid Stevia to be exact.  I bought some chocolate flavored liquid stevia the other day not really knowing what to expect. I knew what I was going for....one of my favorite flavor combinations- mint and chocolate. My plan was to use the chocolate stevia and some crushed mint leaves (from my potted plant) and make some healthy, no calorie, flavorful water.  My plan was successful.  This water is wonderful!  I add four drops and about 4 or 5 mint leaves to my glass of water and I have a refreshing beverage.  It is not Diet Coke by any means but for now it is helping.  If only they would make a Diet Coke flavored liquid stevia!  Boy, would I be in heaven!

AND, my son LOVES it!

I have to figure out the easiest and most painless way to cut the soda completely out of my son's diet
(not going to happen with hubby).  Ughhhh..... It's going to be a fight, but it has to be fought.

The bottles are pretty expensive.  I paid $15.  I can rationalize the expense in many ways: 
1.  We will be healthier without the soda and aspartame 
2.  I am not making daily runs to Sonic 
3.  I am not buying Diet Coke by the case. 
4.  It doesn't take much and my water becomes sweet and flavored.  It should last a while. 

If you would like to learn more about the dangers of aspartame there is tons of info out there.  I recently found Sean Croxton at Underground Wellness.  He has videos on YouTube about health and wellness.  He is very informative.  You ought to check him out! 

Here is a video that he made about Stevia.


I would love to hear from those of you that are going through some similar challenges. 

Let me know if you watch some Underground Wellness videos.

Let me know if you try or use the liquid stevia. 

Wish me luck.  Everyday, I want a Diet Coke.  I have not given into the temptation, but I can make no promises.  Everyday, I want a Diet Coke.

Update:
I have gone 4 weeks without Diet Coke.  The first week or two was very difficult, but it has gotten much easier.  I still have cravings if I eat certain things.  AND my son stopped drinking sodas all on his own...no force involved on my part!  I am so proud of him taking charge of his health like he is and making good, healthy decisions.  He is only 11 by the way.  Pretty impressive, huh???

I have linked up this post to Fight Back Friday at Food Renegade.  Come check out all of the great ideas and recipes!

Tuesday, June 29, 2010

Spicy Cilantro and Lime Potato Salad


I wanted to make a potato salad but not a traditional one.  I am not a fan of the mustard-based potato salad so, I came up with this recipe.  My son and I really liked it- my husband, not so much.  He likes the yellow potato salad and wasn't very excited about eating this green potato salad I set before him. 

I am posting this at Side Dish Showdown at Cinnamon Spice and Everything Nice.  Side dishes have always been a challenge for me.  I have very little creativity when it comes to side dishes and usually all of my attention goes to the protein part of my meals.  This monthly challenge has forced me to think about this important part of the meals we eat.  At least I am creating one good side dish a month.

Side Dish Showdown Blogger Event

I found the dressing recipe at For the Love of Cooking and just added to my ingredients. 

Ingredients:

3 lbs of red potatoes, diced in large chunks and steamed
1 onion, yellow or purple
2 large poblano peppers
2 jalepeno peppers
1/4 cup of sliced green onions


Dressing:
1/2 cup of chopped cilantro
1/4 cup olive or canola oil
1-2 tbsp fresh lime juice
1 tbsp apple cider vinegar OR red wine vinegar
salt and pepper to taste
1 clove garlic minced
1/2 tsp oregano

For the dressing, whisk all ingredients together in a small bowl.  Set aside while you prepare the rest of the salad. 

Roast the onion and peppers under a broiler or on the grill until they are nicely charred.  The peppers should be blistered.  Put the peppers in a bowl and cover with plastic wrap for about 15 minutes to steam them.  Take them out and peel the skin off.  Roughly chop the peppers and onions and add them to the potatoes.  Add the green onions.  Pour the dressing on the potato, onion and pepper mixture and combine well.

The salad can be eaten cold or at room temperature.


This post is also being linked to:

Finer Things Friday

What's on the Menu Wednesday @ Dining With Debbie

Fight Back Friday at Food Renegade


Saturday, June 26, 2010

Chocolate Banana Almond Smoothie


This is my new favorite breakfast lately!  I kind of made it up and have been adjusting a little as I go.  My newest addition is the spinach.  You don't even taste it (proof- my son didn't) and it only changes the color a little. 

I thought I was doing great with this smoothie until I entered the recipe into Spark People.  There are quite a few more calories and fat than I expected.  Now I know that I will only drink half of this smoothie from now on.  My son can drink the rest. 

1 banana
3/4 cup (about) lowfat/fat-free yogurt or kefir
4 cubes of ice
1 ounce almonds
1 tbsp milled flax seeds or chia seeds
1 tsp dark chocolate cocoa powder
1 tbsp chocolate chips
1 handful of baby spinach

Nutrition Facts

(this is just an estimate)
1 Serving

Amount Per Serving

Calories 496.6
Total Fat 25.1 g
Saturated Fat 6.7 g
Cholesterol 11.0 mg
Sodium 147.3 mg
Potassium 1,242.6 mg
Total Carbohydrate 58.5 g
Dietary Fiber 10.0 g
Sugars 36.0 g
Protein 19.2 g

Wednesday, June 23, 2010

Pineapple with Mint

This is one of my favorite summertime treats.  I got the recipe from Whole Foods years ago.  Don't you love walking through that store eating all of yummy samples that they offer? 

It's very simple to make.  All you need is some fresh pineapple, mint and sugar.  I use about 1/4 cup of sugar and 1/4 cup of fresh mint.  I put them (sugar and mint) in my mini food processor and pulse until everything is chopped and the sugar is green.  Combine the mixture with the pineapple.  Let it rest for a little while before serving so the flavors can mingle together. 


This is best if served the same day. The mint tends to turn black/brown if it hangs around too long. 

I have linked this recipe to Foodie Friday at Designs by Gollum. Come check out all of the fabulous recipes that have been posted.

Tuesday, June 22, 2010

Strawberry Almond Clafoutis

I saw this recipe on Cinnamon Spice the other day and knew that I had to make it.  It looked like a fancy French dessert that was didn't look too difficult.  The name is pronounced (kla-foo-tee). I would say that mine is not a traditional clafoutis because you are supposed to use cherries.  I had strawberries in my refrigerator so that's what I used.  It's a crepe-like, custardy dessert that is so easy to put together because all you do is mix everything in a blender and pour it into a dish and bake. 

I made it for breakfast the other day.  Hey!  It was a nutritious breakfast including fruit, protein, whole grain and dairy.  What else do you need?  I rationalized it anyway....

You can eat this warm out of the oven or after it has sat in the refrigerator for a while.  I actually preferred it eaten cold. 

Cherry Almond Clafoutis

(adapted from Saveur)


1/3 cup Sliced Almonds
1 tablespoon Butter
1 tablespoon Vanilla extract
6 Eggs (I used Egg Beaters)
6 tablespoon Sugar
1 + 1⁄4 cups Milk
2 tablespoon amaretto
Pinch Salt
3⁄4 cup All-purpose or White Whole Wheat flour
3 cups strawberries, sliced
Confectioners' sugar (optional)


1. Toast the almonds in a dry skillet over medium-low heat until they get a golden-brown color to them, tossing often. Set aside.

2. Preheat oven to 425° and generously butter a 9" cast-iron skillet or baking dish. Combine vanilla extract, eggs, sugar, milk, amaretto, and salt in a blender. Blend for a few seconds to mix ingredients, then add flour and blend until smooth, about 1 minute.

3. Pour batter into buttered skillet and evenly spread strawberries over top then sprinkle with almonds. Bake for about 30 minutes or until a toothpick comes out clean from center. Let cool for 10 minutes before serving. Dust with confectioners' sugar and a dollop of whip cream if desired.


Saturday, June 19, 2010

PBandJ - Updated Healthier Version


We love peanut butter and jelly sandwiches at our house.  I have done my best trying to make them a little healthier by using fresh all natural peanut butter, reduced sugar jelly and whole wheat bread.  The biggest problem in this sandwich was the jelly.  Even with "reduced sugar" it still wasn't great. 
I found this idea in my new favorite book, The Eat-Clean Diet for Family and Kids by Tosca Reno.  This is a terrific book if you are looking to improve the diet of your family. 


Instead of plain peanut butter, I decided to make some of the healthy peanut butter dip (minus the chocolate chips) I made a couple weeks ago and use that on the sandwich.  It was perfect!  AND instead of the "reduced sugar" jelly I just used some sliced strawberries....no sugar at ALL!  I thought it turned out very yummy and so did my son.  It made a quick lunch after his baseball game today.


I am sharing this post at Souper Sundays at Kahakai Kitchen, Make it From Scratch and Tasty Tuesday at City Wife, Country Life so come check out all of the wonderful soup, salad and sandwich recipes that others are sharing.   

Tasty TuesdaySouperSundays

Thursday, June 17, 2010

Ranch Chicken Salad Sandwich


I didn't think my son would ever eat chicken salad, but I found a way to make it that he loves.  As I have said before, he will eat ranch dressing on just about anything.  I decided to make some chicken salad using the homemade healthy and clean ranch dressing recipe I tried a couple weeks ago.  Total success!

This makes a lot of chicken salad so you may want to half it.  You will also have some ranch dressing left over to use elsewhere. 

Ingredients

4 small chicken breasts, cooked and chopped
3 ribs of celery, chopped
2 cups of grapes, cut in half
1/2 cup of pecans, chopped
2 cups of ranch dressing (recipe below)

Mix all ingredients until well combined. 


Healthy and Clean Ranch Dressing

1 1/2 cups of low fat buttermilk
3/4 cup of plain nonfat greek style yogurt
1 1/4 tsp onion powder
1 tsp dried dill
2 1/2 tsp dried parsley
2 1/2 tsp dried chives
2 1/2 tsp salt

I have linked this recipe to Foodie Friday at Designs by Gollum and Food on Fridays. Come check out all of the fabulous recipes that have been posted.


Wednesday, June 16, 2010

Vanilla Frozen Yogurt


My son and husband get to feeling a little neglected at times because I don't buy ice creaWem often.  I thought that I we could try some frozen yogurt.  Little did I know that this stuff is EXPENSIVE!  I couldn't believe it was at least $3 for a little bucket of frozen yogurt.  Well, I am always on the lookout for new ways to use my homemade yogurt so this provided me the perfect opportunity to use a batch.  I bought an ice cream maker and made my first batch of vanilla frozen yogurt.  I wasn't sure I liked it at first because it was so tangy, but I quickly grew to love it.  I chose to just make a simple batch of vanilla, that way we could flavor it individually. 

The problem with this little treat is that we have it in our heads that it is healthy because it is yogurt.  It is, but there is still quite a bit of sugar that you add.  I have made it several ways; with all sugar, with half sugar and half Splenda and with all Splenda.  I enjoyed all of them.  I think next time I may substitute some honey for some of the sugar. 

The possibilities are endless with this new ice cream machine and all of the different flavor combinations and ingredients that I can use.  AND, at a fraction of the price it costs to buy the store bought.  I figure it costs about $3 to make 1/2 gallon of homemade frozen yogurt.   How can it be better?  I can't wait to experiment! 

3 cups of plain yogurt
3/4 cup of sugar
1 tbsp of vanilla

Mix all ingredients well until the sugar disolves.  Chill in the refrigerator for at least an hour.  Freeze according to your ice cream maker's instructions.  Simple as that!


We like to top our frozen yogurt with a little vanilla agave nectar and fruit or mini chocolate chips.  Enjoy!